Showing posts with label deco mesh. Show all posts

Thursday, October 23, 2014

Episode 140: A Simple Halloween Swag

Do you have a narrow entrance, or a side door you use a lot, or a condo or apartment front door? Well, this craft project may be just for you!  We have a side door that we use almost exclusively, and I have been wanting to decorate it for a while.  So I finally did.  I made a simple Halloween swag out of work garland from Hobby Lobby, deco mesh from The Market in OKC, ribbon from a local store and Sam's as well as some deco flex tubing from OKC (but can also be found at Hobby Lobby and Trendy Tree).  Watch the video at the bottom of the post to see how I secured the swag to the brick. 


The super cute witch hat is by Burton and Burton, and I found it at my local Hallmark Store.  Here are some more pics of my entire side entrance.  The tin sign came from a local store,  The wooden sign was purchased off of ebay.


And here's the video;


Thanks for stopping by!
Take time to "Prettify Your Life"!!!

Image and video hosting by TinyPic

Sunday, October 19, 2014

Episode 137: Halloween Candy Doorscape 2014

Hi Everyone!

Well, here it finally is...my Halloween Candy Doorscape!  I just love decorating for Halloween!!


I actually already had a lot of these decorations from previous years.  I just added the dollar store Large Homemade Halloween Candy that you saw in the previous post.  

SUPPLIES NEEDED:

Orange Metallic Deco Mesh (Hobby Lobby)...remember you get what you pay for with deco mesh
Candy Corn and Orange Chevron Ribbon (The Paul Michael Company)
Pixie Sticks and Small Candy (PYL Tutorials)
Candy Corn Picks (RAZ, Imports)
Wooden Candy Medallions (Made those years ago)
Large Homemade Halloween Candy (See link above)
Floral wire.

And a SUPER cute Candy Corn door hanger from the Etsy Shop: The Wayward Whimsy!  Man I wish I could watch her make her creations!!!

Check out the video:


And here are a few other photos:


Thanks for stopping by!
Take time to "Prettify Your Life"!!!

Image and video hosting by TinyPic

Wednesday, September 10, 2014

Episode 132: Back to School Doorscape

I've had this doorscape up for a while, but I haven't gotten around to making the video and blog post until now.  This back to school doorscape can translate to your own school, college or professional sports team.  It's pretty simple.  So, first, check out the video:


The supplies needed are as follows:

Two colors of deco mesh (21" X 10 yard rolls)
Four types of ribbon
Floral wire
Floral pins
Pom poms or accents of your choice
Styrofoam wreath
Little mum from Michael's
Blank cardboard pennants
Jute
Navy vinyl and Silhouette machine (or you can buy pre-cut letters or even use paper)
Mod Podge for Paper
Foam Brush
8.5 x11" sticker paper (Hobby Lobby)
Football Helmets from Creative Gift Packaging
Valspar White spray paint
Hot Glue Gun and Glue Sticks


Here are a couple of close-up pics:


The megaphone came off.  PLEASE someone advise me on an INDUSTRIAL strength glue to use on wood that withstands heat AND does NOT take a WEEK to dry!!!!!  HELP!

I will talk in more detail tomorrow about how I made the football helmets.

Thanks for stopping by!
Take time to "Prettify Your Life"!!!

Image and video hosting by TinyPic

Wednesday, May 21, 2014

Episode 128: Barbie Silhouette Medallion

Happy Hump Day Crafters!  I am wrapping up my Barbie series with the last how-to video.  This time I am explaining how to make the Barbie Silhouette Medallions as seen here:


SUPPLIES NEEDED:

14 inch cake round
pink ruffle trim (Hobby Lobby fabric dept....use coupon)
hot glue and glue gun
110 pound weight paper (Wal-Mart)
computer and printer for googling Barbie Silhouette
black fun foam
ballpoint pen
good scissors
spray adhesive
In Bloom 16mm pearls with a flat back (Hobby Lobby jewelry dept)
white satin ribbon
picture hanger
floral wire

***Note:  I do NOT sell these.  These decorations are for my personal use only!***

Please watch the video for the detailed instructions:


Thanks for stopping by!
Take time to "Prettify Your Life"!!!

Image and video hosting by TinyPic

Friday, May 16, 2014

PYL hits 4,300 You Tube Subscribers!!! Giveaway Time!


WOW!  My You Tube Channel is now over the 4,300 subscriber mark!  I am BLOWN away!  So, I think it's time for a Giveaway!  I am offering a $25 e-Gift Card to Michael's.  Here's how to enter to win:

1. "Like" the PYL Facebook Page if you haven't done so already.
2.  Find the Giveaway post with the picture like the one posted above.
3.  Comment under the post with some of your summer plans and an e-mail address that I can reach you at.
4.  Drawing will be next Friday, May 23rd at 11pm.

Thanks again for your AMAZING support and interest in my little crafting world!!!

Take time to "Prettify Your Life"!!!

Image and video hosting by TinyPic

Tuesday, May 13, 2014

Episode 126: Garland Decorations--Angela's Cheater Method

Today, I want to talk about the Barbie word picks I made for my Barbie Doors.  

SUPPLIES NEEDED:

Dow Protection Board III Underlayment or some kind of foam board.  Can be purchased at your local hardware store chain.  Here is a pic:

The regular nail file can be used to file small rough edges down if need be.

Printer
Printer Paper
Scissors
Mod Podge
Foam Brush
X-Acto Knife
Self-Healing Cutting Mat
Puff Paint--black, slick finish
Black Glitter
Floral Stakes
Hot Glue
Glue Gun

Please check out this video for detailed instructions:


Thanks for stopping by!
Take time to "Prettify Your Life"!!!

~Angela~


Saturday, May 10, 2014

Episode 125: Barbie Doorscape for my Mom!

As Mother's Day is almost here, I wanted to share the doorscape I've been working on all week.  This Barbie doorscape was inspired by my Mom, Barbara.  She loves Barbie, had the original Barbies and passed on her love of Barbies to me.  So, I dedicate this door to you Mom.  Happy Mother's Day!  I love you so incredibly much!!!!

So, the design started out with a new method for me, the curly wreath method.  I consulted Trendy Tree's Tutorial for the how-to.  It took me 6 rolls of deco mesh--2 pink, 2 gray, and 2 white.  I cut my curls in 14 inch strips and wired one of each color together to make bundles made up of three curls using pipe cleaners.  I got about 25-28 curls per roll.  Invest in a self-healing mat and rotary cutter. You will be glad you did!!!


That's a big pile of deco mesh!


It took approximately 80 bundles to cover the 18 foot garland around my door.  I just twisted the pipe cleaners around the garland.  Here's what it looked like:


I had a couple of companions while I was putting up the deco mesh.


I made all the decorations you see below and embellished the ribbon as well.  I will be giving you those tutorials all throughout the week.  So hang tight and check back!


I also made the Barbie cut out.  I will have a tutorial for this as well later this week.


Check out my video:


I hope you all have a very Happy Mother's Day!!!

Thanks for stopping by!
Take time to "Prettify Your Life"!!!

Image and video hosting by TinyPic

Monday, May 5, 2014

Doorscape Q&A

Over the few years I have been decorating my door and videotaping the various themes, I have gotten some questions.

What do you use for your doorscape base?
How do you hang it?
How do you store it?
Do you take your decorations apart every time you change the theme?

So, I decided to revisit this topic.

To begin with, I use two, cheap $5 Christmas garlands I purchased at Wal-Mart for my doorscape base. Because of the width of my door, I twist the two garlands together to make one long garland.  The garland is pretty thin, so it is easily covered by deco mesh or fabric.


I had my husband drill holes in the brick mortar and screw in ceiling hooks.  There are five on the top and one on each side.  I plan to add one more to each side, close to the bottom. Someone else asked why I didn't do this myself.  Don't get me wrong, I am pretty proficient with power tools, but, well, sometimes I just prefer my husband to handle things.  :-)


The garland slips right into place securely with the ceiling hooks.


What do I do with the decorations I take down?


I roll up any deco mesh, ribbon and glamour rope that wasn't damaged or faded by the elements and store those back in my craft closet.  I store decorations in tubs by theme.  Hope these tips help!

Check out the video:


Thanks for stopping by!
Take time to "Prettify Your Life"!!!

~Angela~


Thursday, May 1, 2014

Episode 124: Hollywood Doorscape

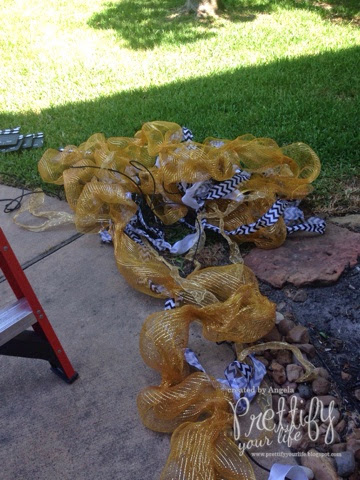
My daughter, the Diva, wanted a Hollywood/Awards themed birthday, so I thought that it would be a great time to jump back into my doorscapes.  I would consider this a basic doorscape, something pretty easy to start with if you have never decorated your door.

Materials Needed:
Gold deco mesh from Hobby Lobby
Gold ribbon from Sam's (seasonal)
Chevron ribbon from Sam's (seasonal)
White ribbon form Hobby Lobby
Glamour rope form Hobby Lobby
Filmstrip ribbon from Etsy Store: Hollywood Baskets
Clapboards from Party City

The base for my garland is inexpensive green Christmas garland.  I applied the deco mesh, ribbon, glamour rope and then, lastly, the clapboards.  I glued floral wire to the backs of the clapboards and wired them into the garland.


And here is the video:


Thanks for stopping by!
Take time to "Prettify Your Life"!!!

Image and video hosting by TinyPic

Thursday, April 10, 2014

#TBT Easter

Happy Thursday Everyone!

We are in the home stretch of middle school softball season...limping along with several injured players.  My daughter's team plays one more game today, and then we will go into the District Tournament tomorrow in the #1 position...WOO HOO!  This is our family's first experience with softball, and I LOVE it!  It's so exciting!  My 3rd grader is the one that got everyone interested.  She is in our school's rec league but has already informed my husband that she wants to play competitive softball.  Oh boy, here we go.  Can our family handle another sport?  IDK  My oldest is a goalie in a competitive soccer club as well as goalie for her school and a member of the school softball team.  My youngest just finished up her cheer year by winning Nationals in Dallas last month.  She has decided to take some time off to focus on softball and then take tumbling after that to keep up her skills.  Her goal (right now) is to make the middle school cheer squad in a few years.  Competitive cheer has burned her out a bit...intense is an understatement.  These two little busy bees keep me hopping.  Sometimes I just want to craft, but instead I have to drive all around north Houston playing "Mom Taxi".  I suspect so many of you out there are in the same boat and are totally nodding your head.

SOOOOO....hence the need for a #TBT (Throw Back Thursday) Easter Doorscape post.  I am so behind on everything decorating.  But, for any new followers out there, you may not have seen this original post. Check out how I did Easter a couple of years ago when we lived in Oklahoma.  For the original blog post, click HERE!


Thanks for stopping by!
Take time to "Prettify Your Life"!!!
Image and video hosting by TinyPic

Friday, October 19, 2012

Episode 113: Halloween Stairs

Happy Friday!

Well, I am behind on it seems like everything since we went to Disney this month.  I finally got my staircase decorated for Halloween.  Supplies used:


  • Cheap Christmas garland
  • Christmas lights
  • twist ties to secure garland
  • black and orange striped deco mesh from The Market at Quail Springs, OKC
  • orange deco mesh ribbon from Hobby Lobby
  • RAZ candy corn garlands and picks from Decorator's Warehouse in Arlington, TX and The Market at Quail Springs
  • ribbon and floral wire, Hobby Lobby
  • Halloween lollipop ornaments form Pier 1 last year
Check out the video:


Now here are some pics:


Thanks for stopping by!
Take time to "Prettify Your Life"!!!


Image and video hosting by TinyPic