Showing posts with label vinyl. Show all posts

Friday, January 4, 2019

Angela's Must Have Craft Tools for 2019

Happy New Year Crafters!


As I was cleaning my craft room today, I was thinking about the tools that are most important to the kind of crafting I do.  So I thought I would share with you my "Must Have Craft Tools for 2019":

A Cutting Machine:  My personal favorite is the Silhouette Cameo because the software is really, really good.

Self-Healing Cutting Mat:  I use the Olfa 24x36 mat  and even bought my 13 year-old daughter one for Christmas.

Rotary Cutter:  I use the Fiskars Comfort Loop Rotary Cutter.  It's an absolute must for cutting fabric, deco mesh and ribbon!


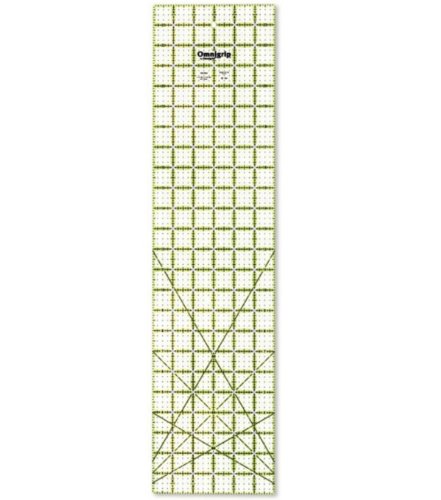
Cutting Ruler: I use an Omnigrip Acrylic Ruler in conjunction with my self-healing mat and rotary cutter.  It really is a great tool for cutting fabric and vinyl!


Permanent Adhesive Vinyl: My preferred choice is Oracal 651.  I try to purchase in 10 yard rolls.  I find it is more economical.  My go-to vendor is Sign Warehouse.

Heat Transfer Vinyl:  Glitter and smooth.  I typically use Siser Easy Weed vinyl.  I purchase this in various places.  I do have a local vinyl store that I frequent, but I have recently ordered from Vinyl Spectrum and was very pleased. I am also pleased to see that Michael's has started selling Siser heat transfer vinyl as well!

Pliers/Wire Cutters:  I bought these Southwire Pliers over a year ago, and they are AMAZING.  They snip all kinds of wire with incredible ease!  If I ever lose these, they will promptly be replaced!

Deco Mesh Holder:  I have two different versions of this tool, The Susie's Original Single Mesh Roller Holder and the Ultimate Mesh Roller.  They take a couple of weeks to receive as they are made by the Etsy Seller, SusiesWreathShop, but they are definitely worth the wait.  I use them for holding ribbon as well as deco mesh.


Steelpix Professional Stemming Machine: Now this stemming machine is a serious investment.  It's definitely not cheap. I was able to use my Hobby Lobby Coupon for this purchase; however, that doesn't always seem to be the case.  I have to say that this machine is really helpful in any kind of wreath, centerpiece or other floral design.


Bow Maker: I have used several over the years, but my favorite is the Pro Bow The Hand.  It's simply genius. I have the large as well as the deluxe.


I encourage you to check out these amazing craft tools.  Let me know what you think.  What's on your "must have" list?  I'm always interested in new craft tools!

Thanks for visiting!
Angela Davis

Saturday, May 31, 2014

Episode 131: Summer Camp!

I have been getting my girls for camp this week, and it's EXHAUSTING!  I was into camp, so this is all new to me.  I had no idea it was SO involved....from the clothes to the costumes to the mail...  Anyway, I have totally broken in my Silhouette Cameo, and I LOVE it!  What took me so long?  The software is amazing and simple!  I have cut a ton of vinyl and heat transfer vinyl.  Addicted!!!

I first decorated their trunks.  The fonts are from http://www.dafont.com/.  Abigail is the "Hippie Movement" font, and Lucy is the "Heartland" font.  Everything except the megaphone was cut out using my Silhouette Cameo.  The megaphone is from my Cricut Expression.


Then I moved onto the shower caddies.  My husband bought these at the dollar store, and I used regular vinyl to label them.


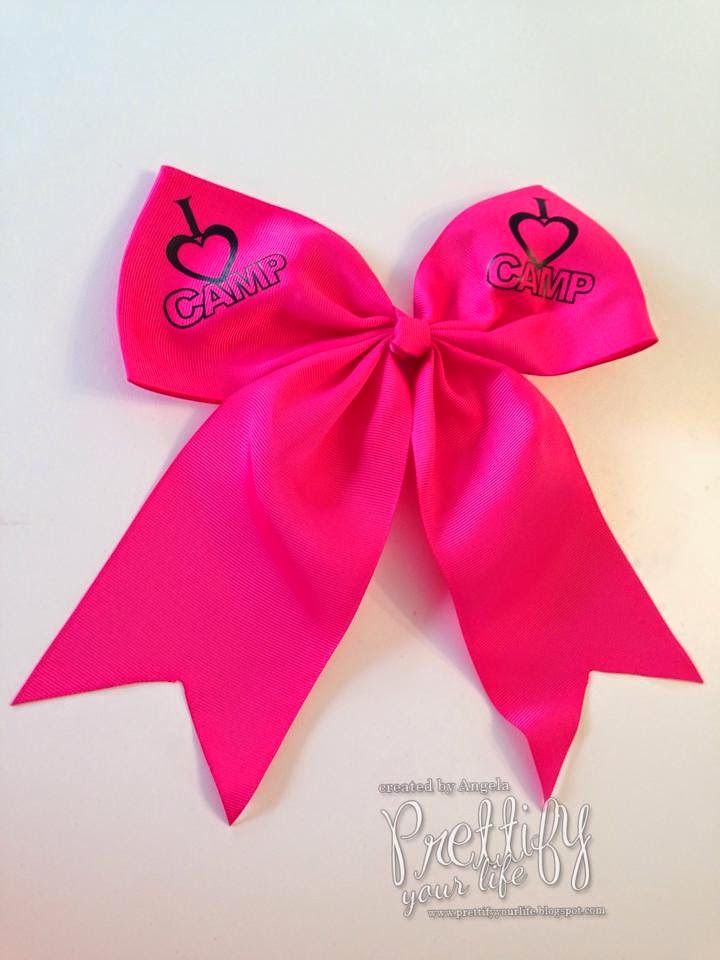
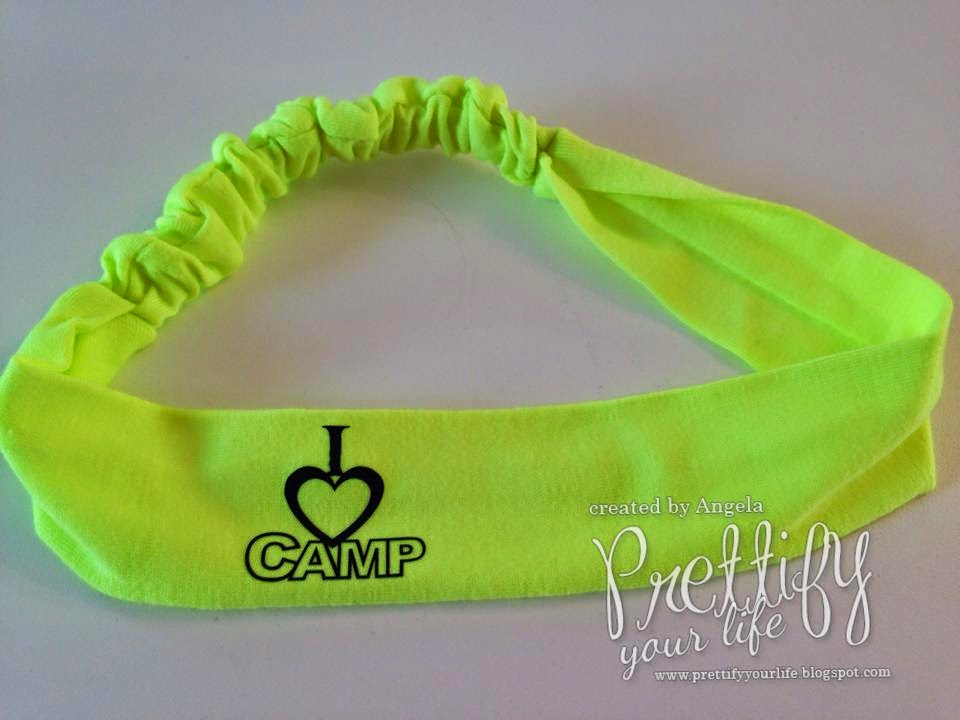
I then decided to heat transfer vinyl a bow and headband I bought from Hobby Lobby.  I bought the image from the Silhouette library.  Remember to mirror your image if you are going to iron on an image.


And lastly, I decided to make welcome gifts for my girls and their cabin mates.  I found the camp logo online, imported it in the Silhouette software, traced the image, added "Summer 2014", mirrored it, cut it out of heat transfer vinyl and applied it to all the inexpensive pillowcases.


I then rolled up the pillowcases, put them in cute chevron gift bags I purchased at Hobby Lobby and tied a fabric marker and little message to it.  I hope the girls have fun signing each other's camp pillowcases and that they make great mementos for them!


Here is the quick video I made for my You Tube Channel:


All these ideas would translate well to birthday parties.  BUTTTT, I am super exhausted from a long day of packing and crafting.  So good night all!

Thanks for stopping by!
Take time to "Prettify Your Life"!!!

Image and video hosting by TinyPic

Wednesday, March 14, 2012

Pinterest Project: Mason Jars with Chalkboard Labels--EASY

If you're on Pinterest, then I'm sure you've seen one of the latest crazes in children's birthday parties--mason jar glasses with chalkboard vinyl labels.  I recently made these for my daughter's birthday, so I thought I would share with you how EASY this project is.

Supplies Needed:

~Mason Jars~
 (Thx to my awesome FB group of crafters and their knowledge, I was able to find a package of 12 mason jars for $7.25 at Big Lots.  Each jar is 5 inches tall, perfect for little hands.  You can also find them in grocery stores and sometimes Wal-Mart, although one WM I went to had none and said they were seasonal items.  Yet, another WM 10 miles away had a TON???? WhatEVA!)

~Chalkboard Vinyl~
(I used Hexis brand chalkboard vinyl purchased on a trial basis from Pick Your Plum.  My FB group asked me months ago what I was going to do with it.  I didn't know until this project, and now I can see myself getting hooked on the stuff. To purchase Hexis Vinyl from Sign Warehouse (my vinyl supplier of choice), click here.  The super nice gentleman I spoke to at Sign Warehouse also stated that they have another vinyl in a slate gray that is non-toxic made by R-Tape.  Check it out here.  I panicked and asked if what I used was toxic.  He said that anything made with PVC (like stickers) when consummed or chewed on a bunch can be toxic.  So apparently the vinyl brand, R-Tape is less toxic?  I'm not really worried about this since I used the vinyl as labels and the kids used straws to drink from.  And hello, they handle stickers all the time.  But, it's good to know, right? )

~Crop-A-Dile II Big Bite~

~Cricut Expression, mat, and a Cricut Scaper.~
If you don't have a Cricut Scraper, get one!

~Cricut Cartridge Lacy Labels~
(Why did I not get this cartridge before?  Purchased at Wal-Mart.)

~And fancy straws~

How-To:

1.  Place the vinyl on the Cricut mat and load it into the machine with the Lacy Labels cartridge already loaded.

2.  I chose the label I wanted and set the size at 2 3/4inches.  I had the blade depth at 5 and the speed and pressure at max.  I also pressed the "Auto Fill" button so that the Cricut would automatically cut out as many labels as would fit on the page.  When I tell you the vinyl cut like butter, I'm serious!  Super easy.

3. Then simply peel away the excess vinyl and use your Cricut scraper to remove the labels.  

4.  Remove the backing and center the label on the flat surface of the jar on the opposite side from the mason jar logo.  Get it right the first time because this chalkboard vinyl is STRONG.

5.  Then use liquid chalk to write the guests' names on the labels.


6.  In order to punch holes in the lid, use your Crop-A-Dile II Big-Bite-Punch on the largest setting.  Thanks Janie for the tip!  Or, as Cheryl said, you can also use an awl.


7.  I then added some fancy dancy straws that I purchased from Polka Dot Market.

Ta Da!  Easy

Now, if you don't have a personal cutting machine like a Cricut or a Cameo, it's ok because Martha Stewart has come out with some chalkboard labels at Staples!  Check them out here.  I went to my local Staples today, and yep, they have a bunch of FABULOUS Martha Stewart Office supplies, including the chalkboard labels. Templates are available online.


Or, you could even buy the vinyl and use my trusty method of making a template out of a file folder, tracing around the template on the back of the vinyl and cutting them out my hand.  That would certainly work too! 

I hope this tutorial has helped.  Give it a try.  It also makes me feel better to have glasses with lids on them, even though they are GLASS and still have a little HOLE in the top.  I guess the word "lid" makes a Mommy feel better.  :-)


****Special Note:  To clean the mason jars, I ran the labels under the faucet and the liquid chalk came right off.  Then I put them in the dishwasher.  Yep, the dishwasher.  If it doesn't go in the dishwasher, it's likely not to even make in my house...unless it's antique jadite. (LOVE)  Not a single label came off.  Far from it.  A couple of jars had a bubble or two underneath, but nothing that couldn't be squeegeed out with your finger.****

Please remember to vote for Prettify Your Life in the Circle of Moms Top 25 Creative Moms of 2012 Blog contest.  Click the Circle of Moms button in the top right-hand column of this blog, then find Prettify Your Life in the list of blogs and click on the orange thumb on the right to cast your vote.  I really appreciate your support!  

Thanks so much for stopping by and checking out my blog and the creations that I personally create!  
I hope you do something to "Prettify Your Life" today!!!


Image and video hosting by TinyPic

Wednesday, January 18, 2012

Episode 77: Quick Wall Art

I've been toying with what to put above my window in the craft room for a while now.  Here's what I came up with:


Supplies needed:

Large 11.5 inch premade letters from Hobby Lobby
Black vinyl and transfer tape (I buy mine from www.signwarehouse.com.)
A cutting machine (I used my Cricut Expression.)
Nails for the wooden letters

Here's the quick video:


Sunday, January 15, 2012

A Simple, But Personal Party Favor

Hi Everyone!

This weekend has been all about my child's birthday, so I had to put together some party favors.  In the pictures below, I am going to show you how I took some store bought items and, using craft supplies I already had, personalized them.

The theme was soccer.  I happened upon some great soccer items on the dollar aisle at Michael's.  I LOVE these vinyl bags!


Then I used my Sesame Street Font Cricut Cartridge (using the Sunny Day option) and purple vinyl (previously purchased at www.signwarehouse.com) and cut out the guests' names at 1.75" for the shorter names and 1.25" for the longer names and applied them to the bags.


Next, I purchased some small black clipboards at Office Depot.


Again I cut out the guests' names (same font) with purple vinyl and applied them to the front of the clipboards.  I cut out the guests' initials at 3 inches and applied those to the back of the clipboards.


I added some additional favors purchased from Michael's and Party Galaxy to purple tissue paper and put them in the bags.


And, lastly, instead of a bow or ribbon I added a cute soccer ball clip purchased at Party Galaxy as an accent to the bag.  Ta Da!  Quick and easy, yet personalized favors.  The guests especially liked the clipboards!


Don't forget to vote for PYL on Top Mommy Blogs and We're on the Fence!  Thx!!!!