I thought I would share what I've been doing tonight. I am decorating a table at my children's school for the Daddy/Daughter dance tomorrow. The theme--PARIS! The table is 6 feet long by 2.5 feet wide--NOT big. You know, one of those cafeteria tables. If I learned anything last year, it was to scale down the size of my decor. I still wanted "places" delineated to show where each person will be sitting, so I decided to make some hot pink Parisian inspired placemats. I should tell you that when I started this project I wasn't exactly sure how I was going to make the picture in my head happen. After fiddling around with my Cricut, I figured out a way. Here's how I did it:
Step 1: I used a regular file folder to create my pattern. I've been doing this a lot lately. I foresee file folders becoming a staple in my craft room. I used Cricut Cartridge Fancy Frames. I cut out Frame 8 at 6.5 inches with pressure max and speed high. I am in desperate need of a new 12 x 24 mat, so after one failed attempt, I taped down the second file folder to ensure it didn't move. Then I removed the cutout.
The "cutout" is the piece on the top. The "negative space" is the portion on the bottom left behind on the file folder.
Step 2: I cut around the outside of the negative space to create a placemat template.
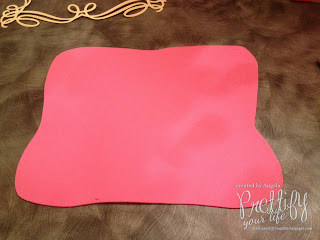
Step 3: Trace around the template on a piece of fun foam, in my case, hot pink.
Step 4: Cut out the image with regular scissors.
Step 5: Tape the cutout to a light box. While I don't use my light box often, it is truly an invaluable tool to have in your craft room. Sometimes, like tonight, it is the exact thing you need to make a project much easier. If you don't have one, I highly suggest you get one!
Step 6: Put your placemat on top of the cutout, lining it up to your satisfaction.
Step 7: Use Dimensional Fabric Paint to trace the lines you see shining up from the cutout on to your placemat. I used Tulip Brand, Slick finish in black.
Step 8: Remove the placemat and let it dry MANY hours, overnight is best. For blog purposes I went ahead and "pretended" this was dry. Tip: I smudge one and was VERY annoyed. I could see having to cut out another placemat and start ALL over. Then, my husband suggested using the Magic Eraser. I thought it was worth a shot. And guess what? The Magic Eraser took the smudged dimensional paint right off! My husband rocks!!!
Step 9: Print out some place cards using Avery blank business cards and a fun font. This font is called "Shelter Me". I downloaded it from http://www.dafont.com/. LOVE that website! Fabulous fonts! I bought the little purse place card holders a few years ago. And TA-DA! It's complete (or it will be when it dries)!
A note about the dimensional paint. It is not for the faint of heart. I have to admit it was a bit nerve racking. It's a lot like piping icing on a cake. Don't do this if you've had a pot of coffee! I can't wait to put the rest of the table together tomorrow and share it with you!


I just can't believe how talented you are. This is adorable!
ReplyDeleteI can't wait to see it all put together - I'm sure it will ROCK!!
ReplyDelete