
Hi Crafters!
Now that it is summer and our schedule has FINALLY started to slow down, I am tackling a project that has been on my to-do list (my mental vision board, if you will) for a LONG time. I have an upstairs breezeway that connects the house with my craftroom. My craftroom is the space over our garage. It's a cute little breezeway where, as some of you may have seen, I hung my over-the-top pink chandelier. Heck yea I brought that thing from Oklahoma! And let's be honest, a pink chandelier isn't everyone's cup of tea. Anyway, I've had big mental plans for probably over a year now for that space. I want it to be a little area where I can sit and read my craft magazines or work on a bible study. Just a quiet space. Here's the before:
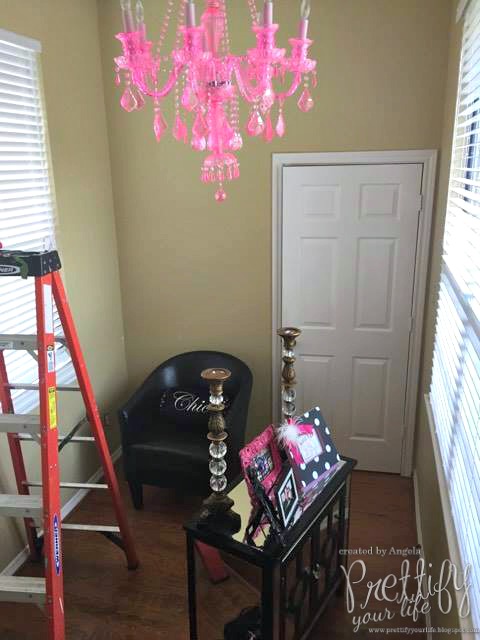
The door leads to my craftroom. I don't know what the paint color is. It was that way when we bought the house. So my vision: to decoupage all the walls in vintage dress patterns. I saw this one time before on Pinterest about three years ago, and I fell in love! I have a thing for vintage, and I love the texture and interest of decoupage. The first thing to do was gather supplies. I bought a large lot of vintage dress patterns on ebay. I then bought a HUGE bottle of Mod Podge in GLOSS finish on Amazon and finished the supply list with a Mod Podge brush (love that thing) and a Mod Podge roller (I've honestly used my hand and brush more than the roller, but it's still nice to have if I need extra pressure.)


Then, I just started decoupaging. Apply a layer of Mod Podge to an area of your wall. Apply the dress pattern. Press down either with your hand or the roller. Finally, apply a top coat of mod podge on the dress pattern. Repeat. Overlap for interest.

It's an awesomely creative project to get your kids involved in. My mini-me daughter had fun sorting out the pattern parts and judging the horrendous fashions of the seventies. LOL. Can't argue with her! She also helped me with the larger and higher up pieces.

(Note that in this pic, the pieces below the window aren't dry. That's some of the glue you are seeing, but it does dry clear! Very forgiving!) I will go back once I am done and tidy up the edges of the moldings and windows once I am finished. It is a tedious project, but I CANNOT WAIT to see the finish product. Stay tuned. Next week, my mom and I will be sewing hot pink floor-to-ceiling curtains to frame the windows. I also have a vintage picture of my very dearly missed Memaw that I had blown up on canvas that I will be adding to the room (after I glam it a bit).
This project is not for the wimpy. Once you start, you ARE committed. And before I get the question, the answer is: No, my husband doesn't mind at all. He supports my creativity 100%. And I may inwardly roll my eyes at those spouses that stifle creativity. I will leave you with one last thought:

Pass it on!

love your youtubes and blogs. I just found you and so glad I did..
ReplyDeleteMerkur Review - What is the Merkur 933g?
ReplyDeleteThe Merkur 933g is 메리트 카지노 주소 one of Merkur's original wet shaving products that is designed to 메리트 카지노 deliver maximum enjoyment and 온카지노 convenience to wet shavers.
This was lovely thanks for sharing
ReplyDeleteI enjoyed readinng this
ReplyDelete