

Notice my daughter's American Girl doll has a wrapped ankle? The result of an unfortunate cheerleading stunt gone wrong, or so I've been told. The doll fell after her spotters dropped her while doing an extension. LOL...
Here is a video. More instructions and pics are below.
SUPPLIES:
Sculpey clay--used for the "dough" of the donuts
Fimo clay--used for the "icing, filling, and sprinkles"
Play Dough rollers and tools
A clay flower shape cutter (just used on one donut as we chose a different process than was planned)
Straws to cut the donut holes
I did use an extruder for some of the sprinkles, but that was NOT easy. (Give me a shout with tips to use that contraption. Don't know if I didn't work the clay enough or what?)

I didn't take a pic of the Sculpey clay before using it all and throwing away the wrappers, but it pretty much looks like this as well. The packages are about $2.25 a piece. I used half of the package for one donut (dough part) and 1/8th of the package of clay for the icing. The Sculpey clay is scored into four sections, and the Fimo clay is scored into eight sections. The clay breaks off easily at these scored points.
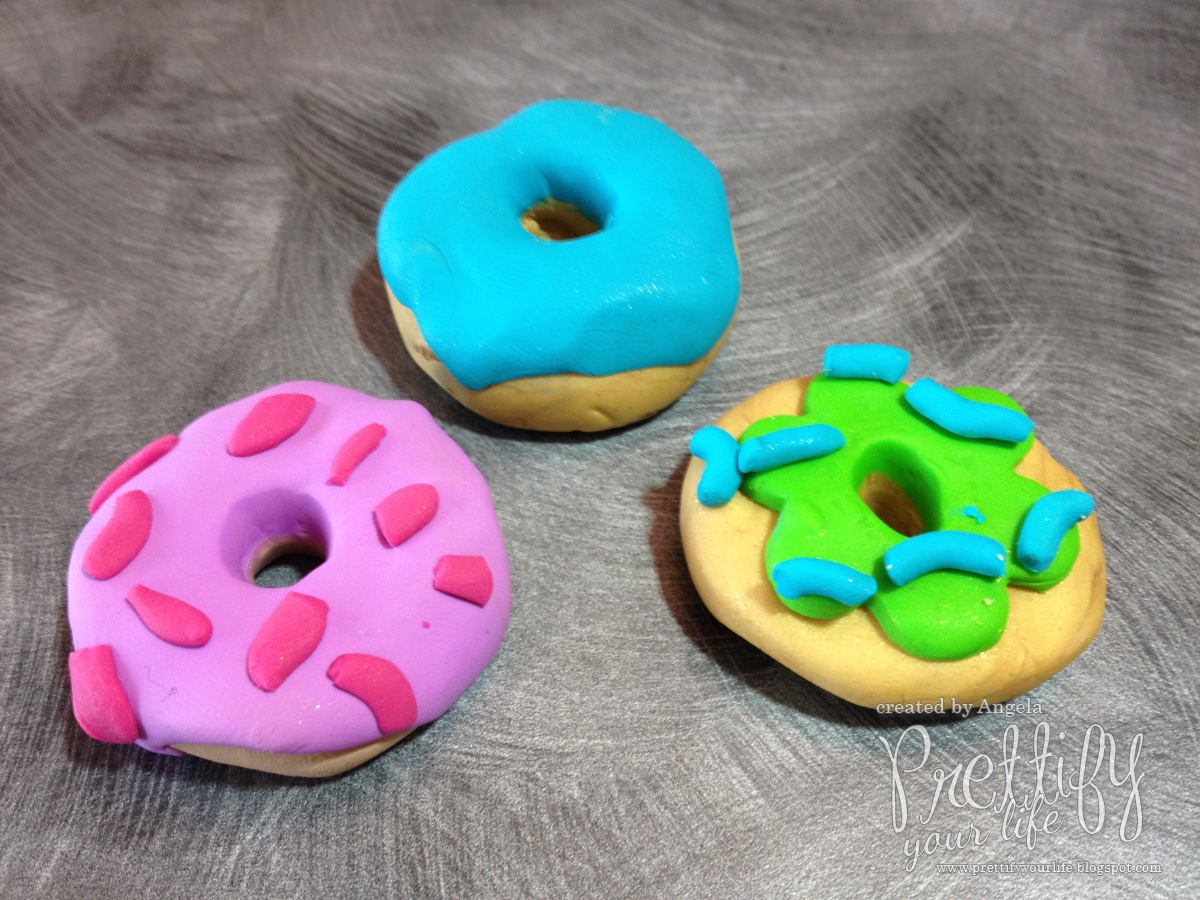
I found a You Tube video that explained the polymer clay donut making process. For the link, click here. There are several helpful clay videos on You Tube. I used a straw to make the donut holes. After the donuts were created, I put them in a glass casserole dish (which I have been told I should now ONLY use for clay) and baked the donuts at 230 degrees in my regular oven for 30 minutes. They turned out perfect! I've also seen on You Tube where you can use a toaster oven as well. Take a look at our doll donuts. Aren't they cute???


Lastly, we did use an American Doll for scale while creating our donuts.

I hope you give this a try with your kiddos. I know we will be doing this again. My older daughter especially enjoyed this project. It's great bonding time.
Special thanks to Valerie, Rachel, Rhonda, and anyone else I may have forgotten from the PYL FB Group that gave me advice on working with polymer clay. This is a perfect example of why you should join the PYL Facebook Group, plenty of crafters that can give you advice and steer you in the right direction when tackling a craft that is new to you.
Special thanks to Valerie, Rachel, Rhonda, and anyone else I may have forgotten from the PYL FB Group that gave me advice on working with polymer clay. This is a perfect example of why you should join the PYL Facebook Group, plenty of crafters that can give you advice and steer you in the right direction when tackling a craft that is new to you.
Please remember to vote for Prettify Your Life in the Circle of Moms Top 25 Creative Moms of 2012 Blog contest. Click the Circle of Moms button in the top right-hand column of this blog, then find Prettify Your Life in the list of blogs and click on the orange thumb on the right to cast your vote. I really appreciate your support!

I used to LOVE that stuff! We made all kinds of stuff with it. I think it was the FIMO clay. I remember that it was most malleable when a little bit warm from kneading it. What a great idea!!! The girls will love it. We made jewelry with it too. But not all of the jewelry came out great. Lol. Lots of fun though!
ReplyDelete-Becca
Looks like they had a fun time! The donuts turned out so cute.
ReplyDeleteI recommend an extruder with a crank. Much easier on your hands than the extruders that you have to push. They are more expensive though.