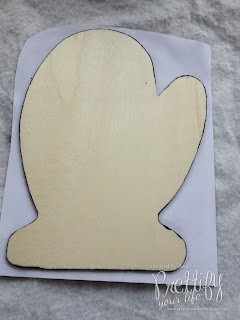
Step 1:
I purchased wooden Christmas Santa Mittens at Michael's. Why the stores put those ridiculously sticky bar code stickers on them that you can't hardly get off is totally beyond me. My trick: soak the sticker in Goo Gone and gently scrape the sticker off. Some of the ink will come off, but since I was covering these with paper I didn't worry about it. If you don't have any Goo Gone, GET SOME! Love that stuff!
Step 2:
Color the edges of the mitten with an Acrylic Paint Pen (I used black)...so much easier and quicker than regular paint. And it dries in minutes. You can buy these pens at any local craft stores.
Step 3:
Apply Mod Podge to the top of the scrapbook paper of your choice with a cheap foam brush. I picked this fun animal print up at Hobby Lobby. However, I put too much Mod Podge on the paper, so when you do it just go for a light coat. The whole purpose of this is to stiffen up the paper to make it easy to cut with the xacto knife. Let the paper completely dry.
Step 4:
Step 5:
Put the mitten (adhesive side down) onto the back of the scrapbook paper. Press down firmly and use a Mod Podge roller, rolling pen, or even a soup can to get the bubbles out. Now, I did this outside on a VERY cold day. This is the first time I have ever had problems with the paper adhering to the spray adhesive, so I think the weather may have played a role in my problem. Annoyed...
Step 6:
Use your xacto knife and, from the backside, trim off the excess paper around the mitten. Make sure you have a sharp xacto knife, or you risk ripping the paper.
Step 7:
Now, here is where I started getting pretty frustrated. For some reason, the paper wasn't sticking to the wood with the spray adhesive. Again, I have never had this problem. Two things could've possibly caused this. I either applied too much Mod Podge to the paper, or the adhesive was affected by the extreme cold temperature when I sprayed it on the wood outside. SO, I pulled out my ATG 714 Gun (purchased at http://www.framingsupplies.com/) and got the paper to stick. If you don't have an ATG 714 or the pink equivalent sold at Michael's, I strongly suggest you get one. The tape is strong and goes a LONG way!
Step 8:
Now that the paper was FINALLY adhered and trimmed, I decided to apply Glitter Blast Glitter Spray in the Diamond Dust color. LOVE!
Step 9:
I trimmed batting to fit the top part of the mitten and hot glued it. I created a template out of paper and used the template to cut out my batting.
Step 10:
I used my Crop-A-Dile II Big Bite to punch a hole through the top of the mitten. And then I strung some heave gauge white floral wire through the hole for hanging purposes.
Step 11:


No comments:
Post a Comment
Post your comment here!